Author: dpepper
How To Create a MySQL Database in cPanel
II. How To Create an Email Account in cPanel
III. How To Set Your Default Address in cPanel
IV. How To Set up an Autoresponder in cPanel
V. How To Set up Email Forwarding in cPanel
VI. How To Set up Email Filters in cPanel
VII. How To Enable Spam Protection in cPanel
VIII. How To Add an MX Entry in cPanel
IX. How To Use Webmail from Within cPanel
X. How To Change Your cPanel Password
XI. How To Update Your Contact Information in cPanel
XII. How To Change Your cPanel Theme
XIII. How To Change the Primary Language in cPanel
XIV. How To Add a Record With the DNS Zone Editor in cPanel
XV. How To Back up Your Website in cPanel
XVI. How To Use the Disk Space Usage Tool in cPanel
XVII. How To Create Additional FTP Accounts in cPanel
XVIII. How To Password Protect a Directory in cPanel
XIX. How To Use the IP Blocker in cPanel
XX. How To Set up Hotlink Protection in cPanel
XXI. How To Create a Subdomain in cPanel
XXII. How To Create an Addon Domain in cPanel
XXIII. How To Create a Domain Alias in cPanel
XXIV. How To Set up Domain Redirects in cPanel
XXV. How To Create a MySQL Database in cPanel
XXVI. How To Use the Index Manager in cPanel
XXVII. How To Create Custom Error Pages in cPanel
XXVIII. How To Set up a Cron Job in cPanel
This tutorial assumes you’ve already logged in to cPanel, and are starting on the home screen. Now let’s learn how to create a MySQL database.
How To Use the Index Manager in cPanel
II. How To Create an Email Account in cPanel
III. How To Set Your Default Address in cPanel
IV. How To Set up an Autoresponder in cPanel
V. How To Set up Email Forwarding in cPanel
VI. How To Set up Email Filters in cPanel
VII. How To Enable Spam Protection in cPanel
VIII. How To Add an MX Entry in cPanel
IX. How To Use Webmail from Within cPanel
X. How To Change Your cPanel Password
XI. How To Update Your Contact Information in cPanel
XII. How To Change Your cPanel Theme
XIII. How To Change the Primary Language in cPanel
XIV. How To Add a Record With the DNS Zone Editor in cPanel
XV. How To Back up Your Website in cPanel
XVI. How To Use the Disk Space Usage Tool in cPanel
XVII. How To Create Additional FTP Accounts in cPanel
XVIII. How To Password Protect a Directory in cPanel
XIX. How To Use the IP Blocker in cPanel
XX. How To Set up Hotlink Protection in cPanel
XXI. How To Create a Subdomain in cPanel
XXII. How To Create an Addon Domain in cPanel
XXIII. How To Create a Domain Alias in cPanel
XXIV. How To Set up Domain Redirects in cPanel
XXV. How To Create a MySQL Database in cPanel
XXVI. How To Use the Index Manager in cPanel
XXVII. How To Create Custom Error Pages in cPanel
XXVIII. How To Set up a Cron Job in cPanel
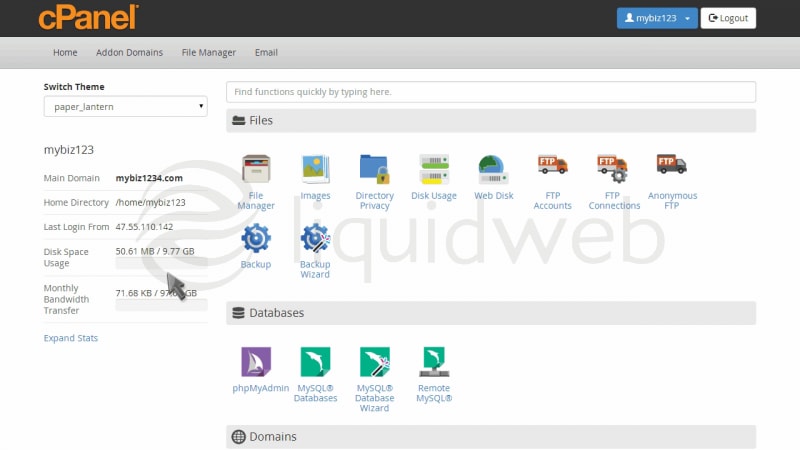
- This tutorial assumes you’ve already logged in to cPanel, and are starting on the home screen.
- Now let’s learn how to use the Index Manager.
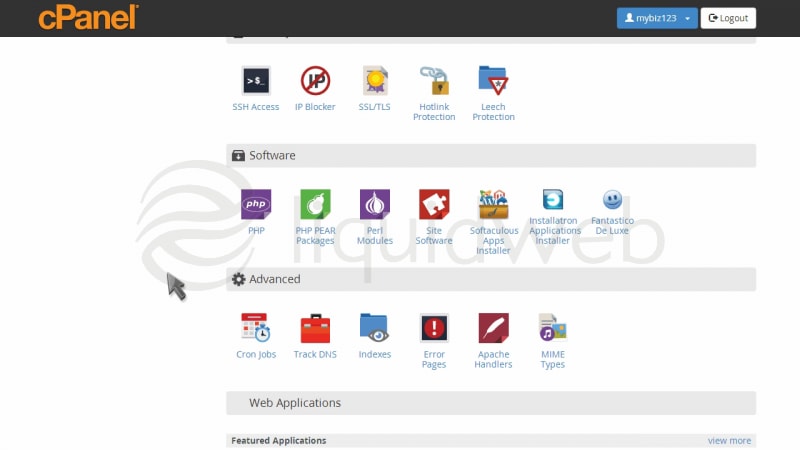
- Click the “Indexes” icon.
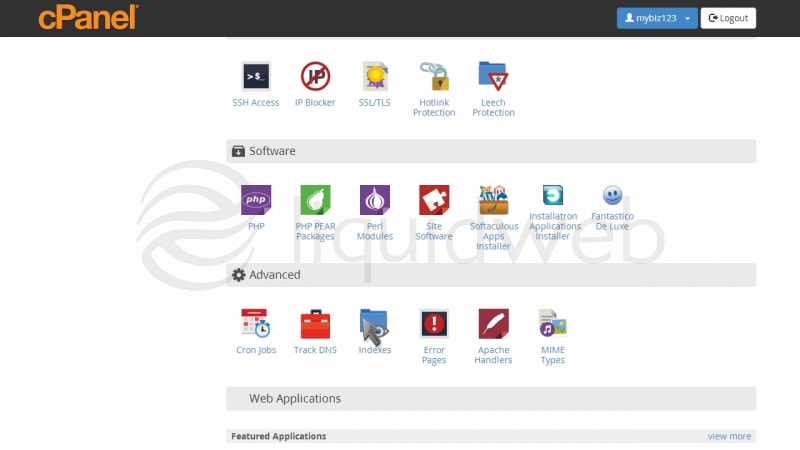
- The Index Manager enables you to control how directories on your website are displayed.
If there is no index.html file in a given directory, the contents of that directory will be listed in a browser. This can cause security issues. With Index Manager, you can set your account up to not allow your directory contents to be shown.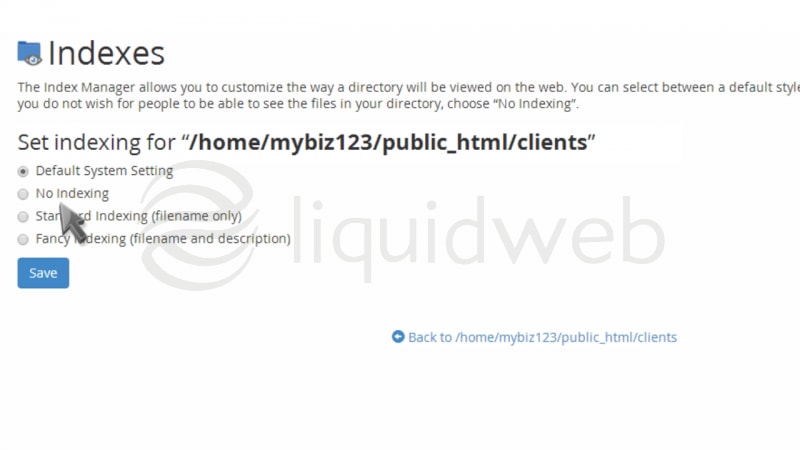
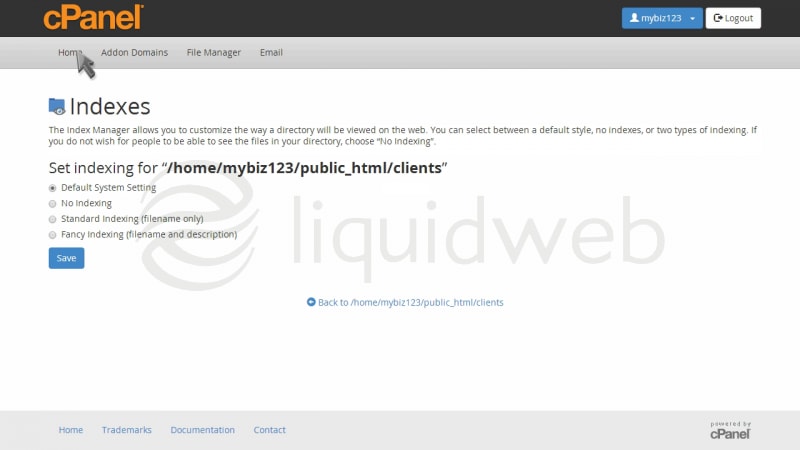
- Let’s setup Index Manager for the client’s directory.
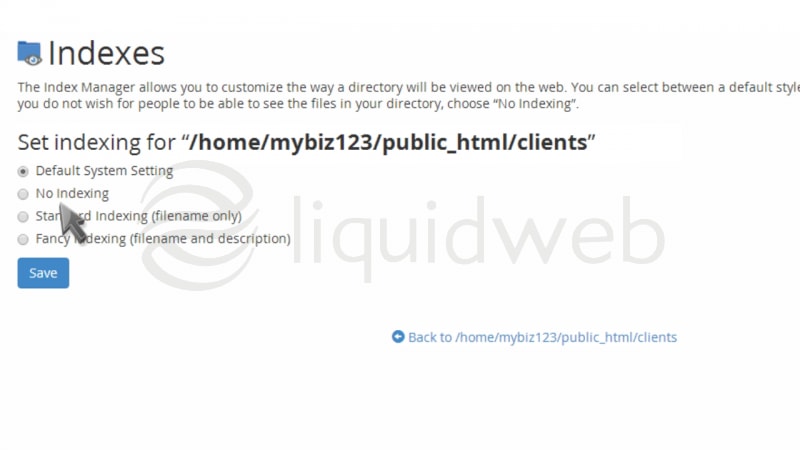
- There are four settings to choose from.
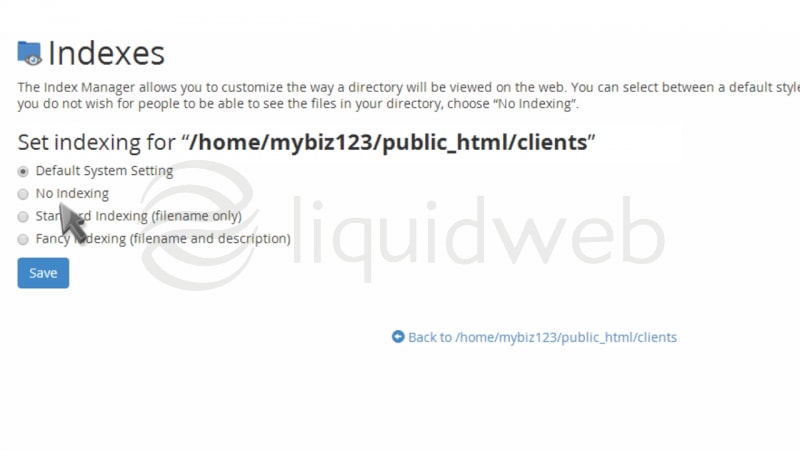
- The “Default System Setting” allows the directory contents to be shown. “No Indexing” does not allow directory contents to be shown. “Standard Indexing” prevents browsers from viewing contents of directories that do not contain image files. “Fancy Indexing” displays file names and information, such as file size and the last-modified date.
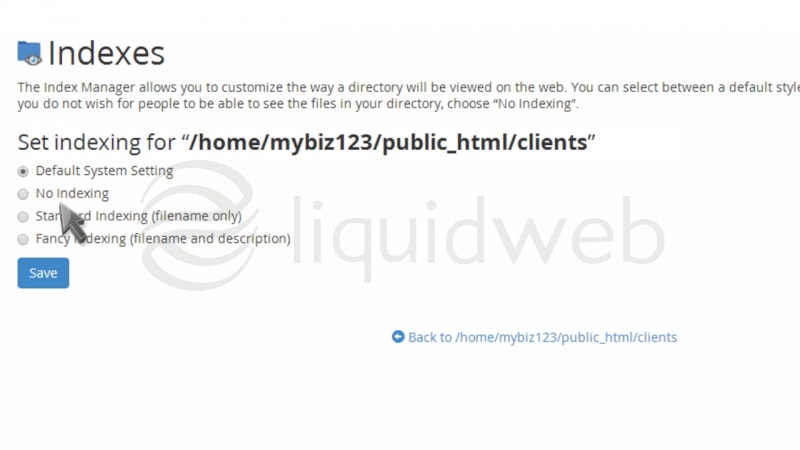
- Since we do not want the contents of this directory shown, we’ll choose the “No Indexing” option.
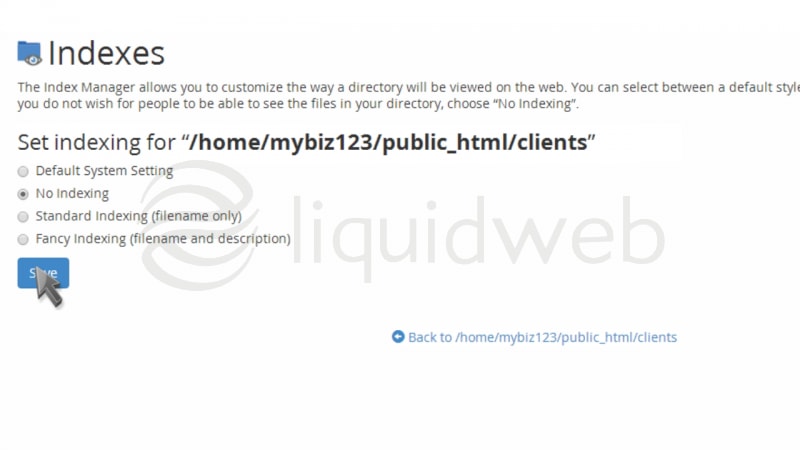
- That’s it! The index settings have been updated, and visitors can no longer view the contents of the clients directory.
How To Create Custom Error Pages in cPanel
II. How To Create an Email Account in cPanel
III. How To Set Your Default Address in cPanel
IV. How To Set up an Autoresponder in cPanel
V. How To Set up Email Forwarding in cPanel
VI. How To Set up Email Filters in cPanel
VII. How To Enable Spam Protection in cPanel
VIII. How To Add an MX Entry in cPanel
IX. How To Use Webmail from Within cPanel
X. How To Change Your cPanel Password
XI. How To Update Your Contact Information in cPanel
XII. How To Change Your cPanel Theme
XIII. How To Change the Primary Language in cPanel
XIV. How To Add a Record With the DNS Zone Editor in cPanel
XV. How To Back up Your Website in cPanel
XVI. How To Use the Disk Space Usage Tool in cPanel
XVII. How To Create Additional FTP Accounts in cPanel
XVIII. How To Password Protect a Directory in cPanel
XIX. How To Use the IP Blocker in cPanel
XX. How To Set up Hotlink Protection in cPanel
XXI. How To Create a Subdomain in cPanel
XXII. How To Create an Addon Domain in cPanel
XXIII. How To Create a Domain Alias in cPanel
XXIV. How To Set up Domain Redirects in cPanel
XXV. How To Create a MySQL Database in cPanel
XXVI. How To Use the Index Manager in cPanel
XXVII. How To Create Custom Error Pages in cPanel
XXVIII. How To Set up a Cron Job in cPanel
- This tutorial assumes you’ve already logged in to cPanel, and are starting on the home screen.
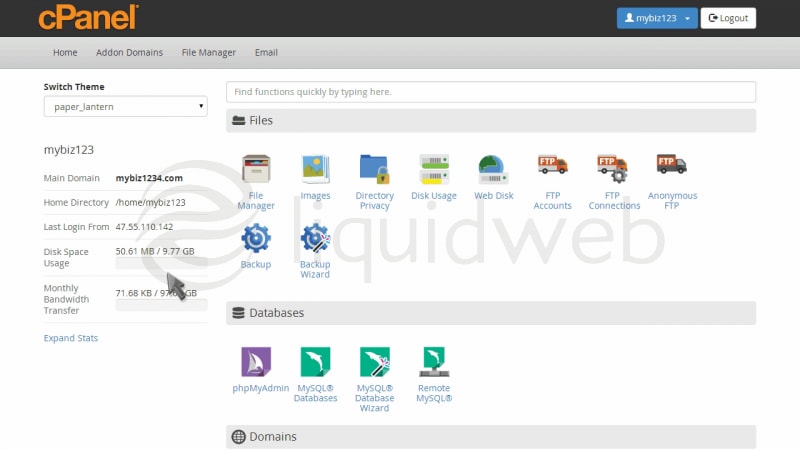
- Now let’s learn how to create custom error pages.
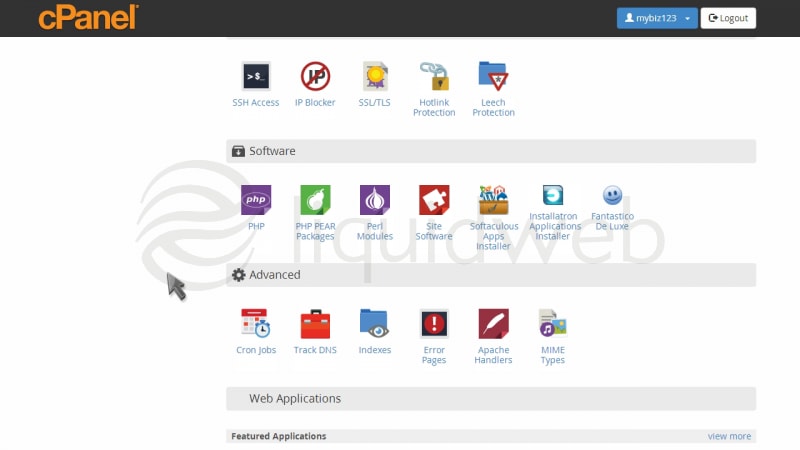
- Click the “Error Pages” icon.
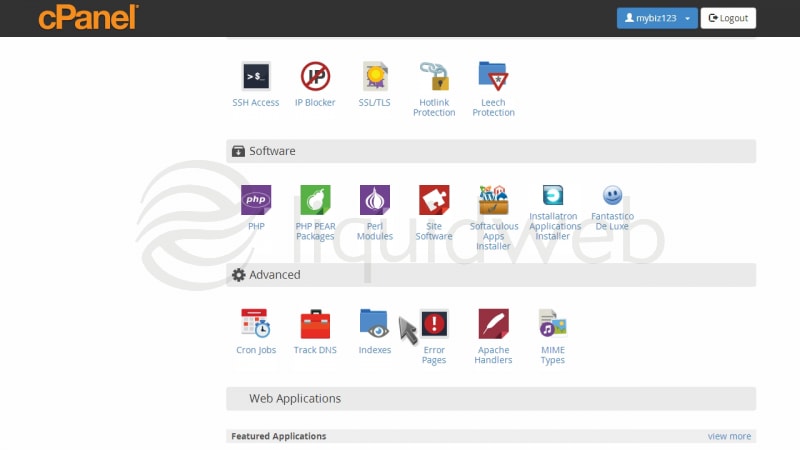
- There are several different error pages you can customize. Let’s customize the “404 error page”.
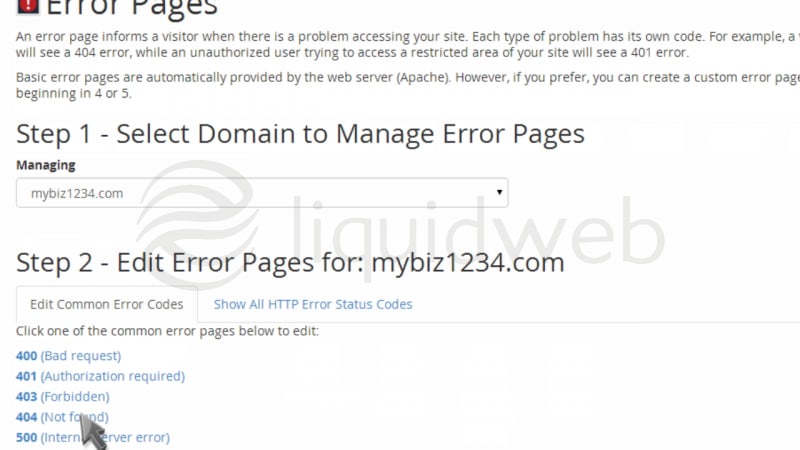
- This is where you create your custom error page… and you can include one or more tags to further customize the page.
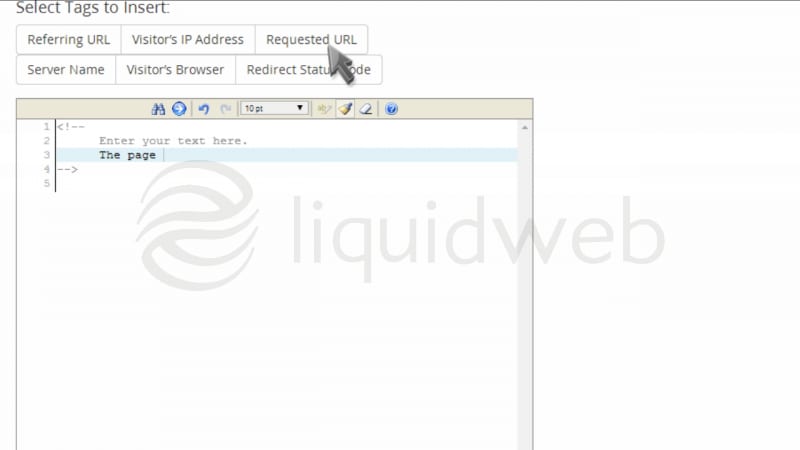
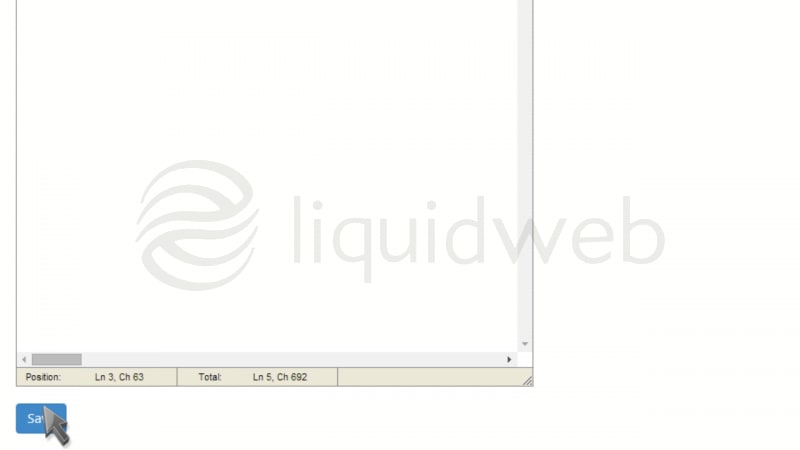
- When finished, click “Save”.
- That’s it! The custom 404 error page has been created.
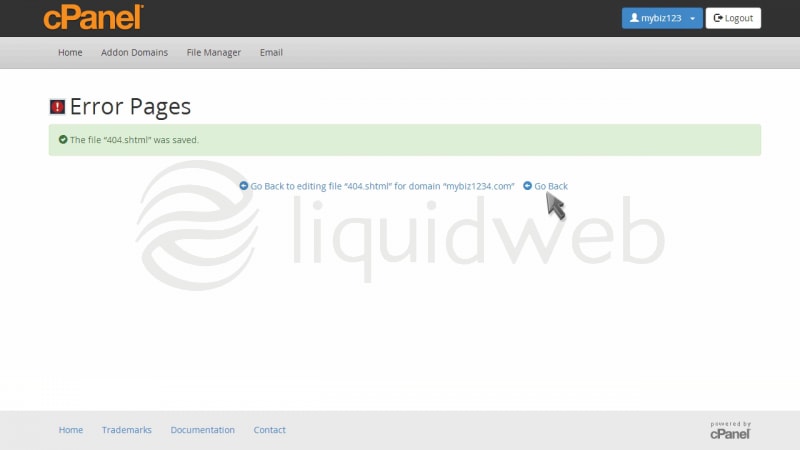
- You can customize the other error pages as well … but you don’t have to … all accounts come preset with standard error pages.
II. How To Create an Email Account in cPanel
III. How To Set Your Default Address in cPanel
IV. How To Set up an Autoresponder in cPanel
V. How To Set up Email Forwarding in cPanel
VI. How To Set up Email Filters in cPanel
VII. How To Enable Spam Protection in cPanel
VIII. How To Add an MX Entry in cPanel
IX. How To Use Webmail from Within cPanel
X. How To Change Your cPanel Password
XI. How To Update Your Contact Information in cPanel
XII. How To Change Your cPanel Theme
XIII. How To Change the Primary Language in cPanel
XIV. How To Add a Record With the DNS Zone Editor in cPanel
XV. How To Back up Your Website in cPanel
XVI. How To Use the Disk Space Usage Tool in cPanel
XVII. How To Create Additional FTP Accounts in cPanel
XVIII. How To Password Protect a Directory in cPanel
XIX. How To Use the IP Blocker in cPanel
XX. How To Set up Hotlink Protection in cPanel
XXI. How To Create a Subdomain in cPanel
XXII. How To Create an Addon Domain in cPanel
XXIII. How To Create a Domain Alias in cPanel
XXIV. How To Set up Domain Redirects in cPanel
XXV. How To Create a MySQL Database in cPanel
XXVI. How To Use the Index Manager in cPanel
XXVII. How To Create Custom Error Pages in cPanel
XXVIII. How To Set up a Cron Job in cPanel
- This tutorial assumes you’ve already logged in to cPanel, and are starting on the home screen.

- Now let’s create a new email account.

- Click the Email Accounts icon.

- Enter the email address you want to create, and assign it a password.

- Set a mailbox quota for the account if you wish.

- Then click “Create Account”.

- That’s it! The new email account has been successfully created.

- From the Email Accounts screen you can access webmail for the account, change its password, change the quota, or even delete the account.

How to Add or Modify DNS Records in Manage
Overview
A security vulnerability has been discovered in the ImageMagick software suite that can potentially allow remote code execution.
Plesk: How to Disable Statistics and Maintenance Emails
Plesk 12.5 runs two scheduled tasks every day to compile web statistics and perform daily maintenance. By default, Plesk will send an email to the administrator every time each the tasks completes, which some users may consider a minor annoyance. Fortunately, it’s easy to adjust the notification options for these scripts so that emails are only generated when an error occurs.
Database Backup and Restore in Plesk 12.5
In this article, we discuss the backup and restore of databases in Plesk. In earlier versions of Plesk, it was required to use database management tools to dump your databases. But in Plesk 12.5, it allows you to backup a database (by exporting a database dump as an SQL file) and then restoring them (by importing a database dump as an SQL file) without actually having to leave the control panel! Let’s take a look at how to accomplish this task…
How To Add Users and Assign Roles in Plesk
You can add or edit users, and create and assign roles via Plesk’s user settings page. The method for accessing user settings is slightly different in various Plesk views:
Let’s Encrypt is a free, automated, and open certificate authority from the Internet Security Research Group (ISRG). It enables anyone to install a free trusted SSL certificate on their website and benefit from the enhanced security an encrypted connection provides. Unlike a self-signed SSL certificate, which also is free and secure (but not verified), a Let’s Encrypt certificate is recognized as fully verified and will display the padlock icon in the address bar of modern browsers.
Our Sales and Support teams are available 24 hours by phone or e-mail to assist.

