


5 Steps to Connect My Mac to a Windows Server
System administrators use several devices for managing their server environments. For example, Mac users who work in their native Unix environment are familiar with using the terminal to SSH into their Linux-based servers. However, when using a Mac to log into a Windows environment, the task is different.
Setting up a remote desktop connection for Mac is easy to do. Windows machines use a different protocol, one aptly named RDP (Remote Desktop Protocol), to manage connections between Windows servers and end-user devices. We will explore using the Microsoft remote desktop setup for Mac to connect to a Windows server for our tutorial.
What You Need
- Mac OS X El Capitan – Version 10.11.16 and above.
- Windows VPS or Dedicated server with Windows Server 2016 or above.
- Your Server IP address.
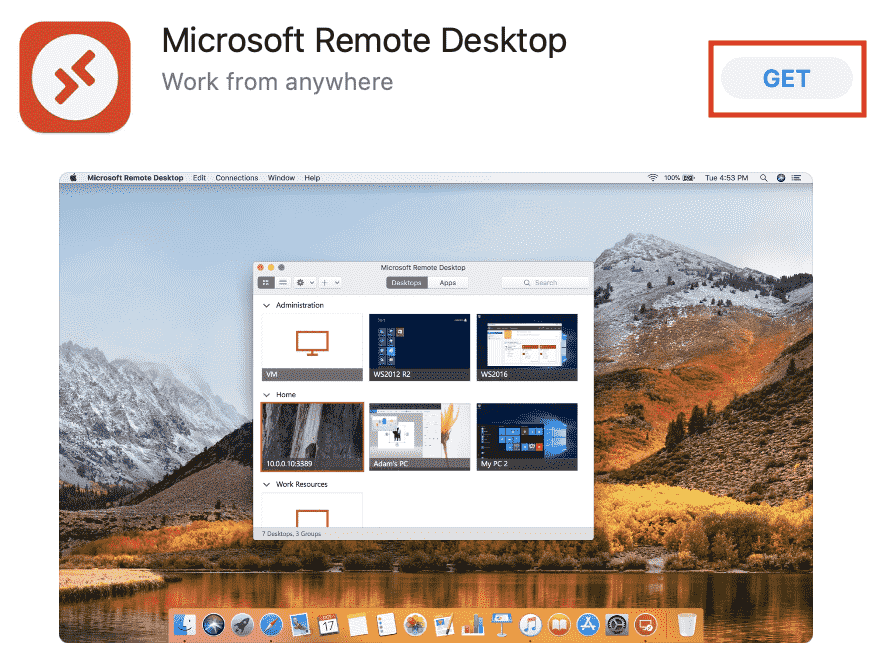
Step 1: Locate Microsoft Remote Desktop
To download Microsoft Remote Desktop, open the App Store within your Applications folder by searching for the program. You can also do this by opening the Launchpad if it is not already one of the apps in your Dock.


Step 2: Install Microsoft Remote Desktop
After locating the Microsoft Remote Desktop app, click Get. The icon will change to say Install, and the button will turn green. Click Install.
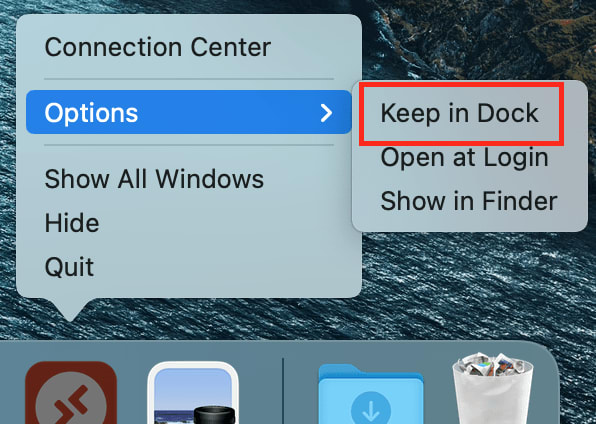
Step 3: Open the App
Once installed, launch the app by clicking on the Microsoft Remote Desktop icon in your Applications folder or activate from within the Launchpad.
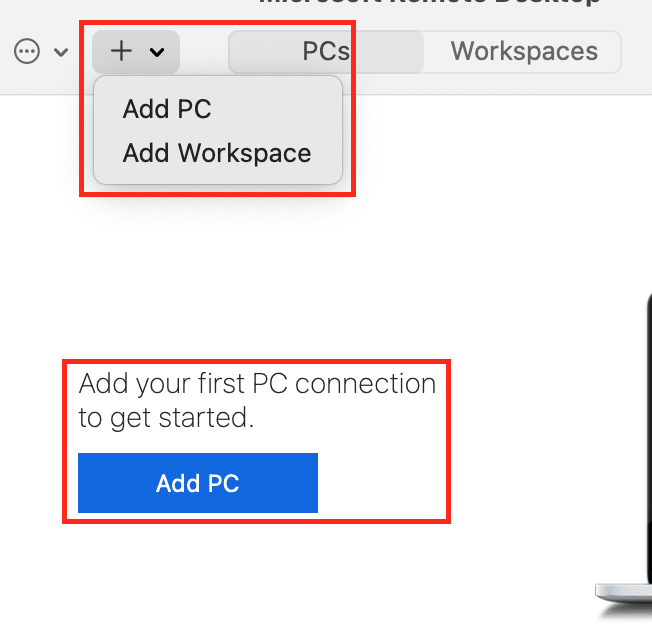
Step 4: Set Up Your Microsoft Remote Desktop Connection
With the program opened, you will either click + at the topor Add PC in the middle of the window to add a new connection.
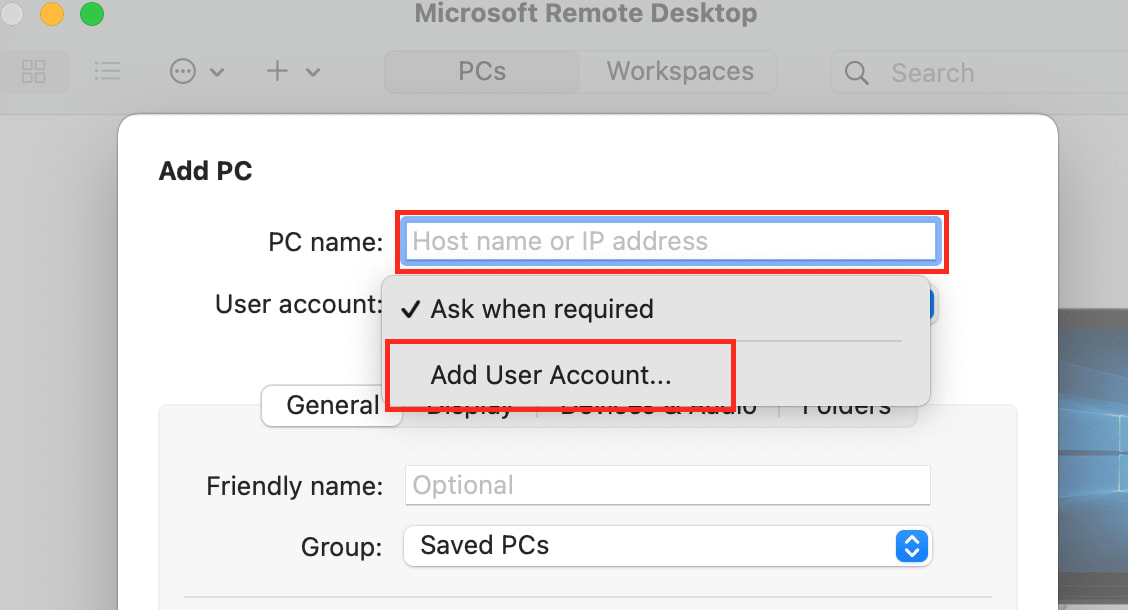
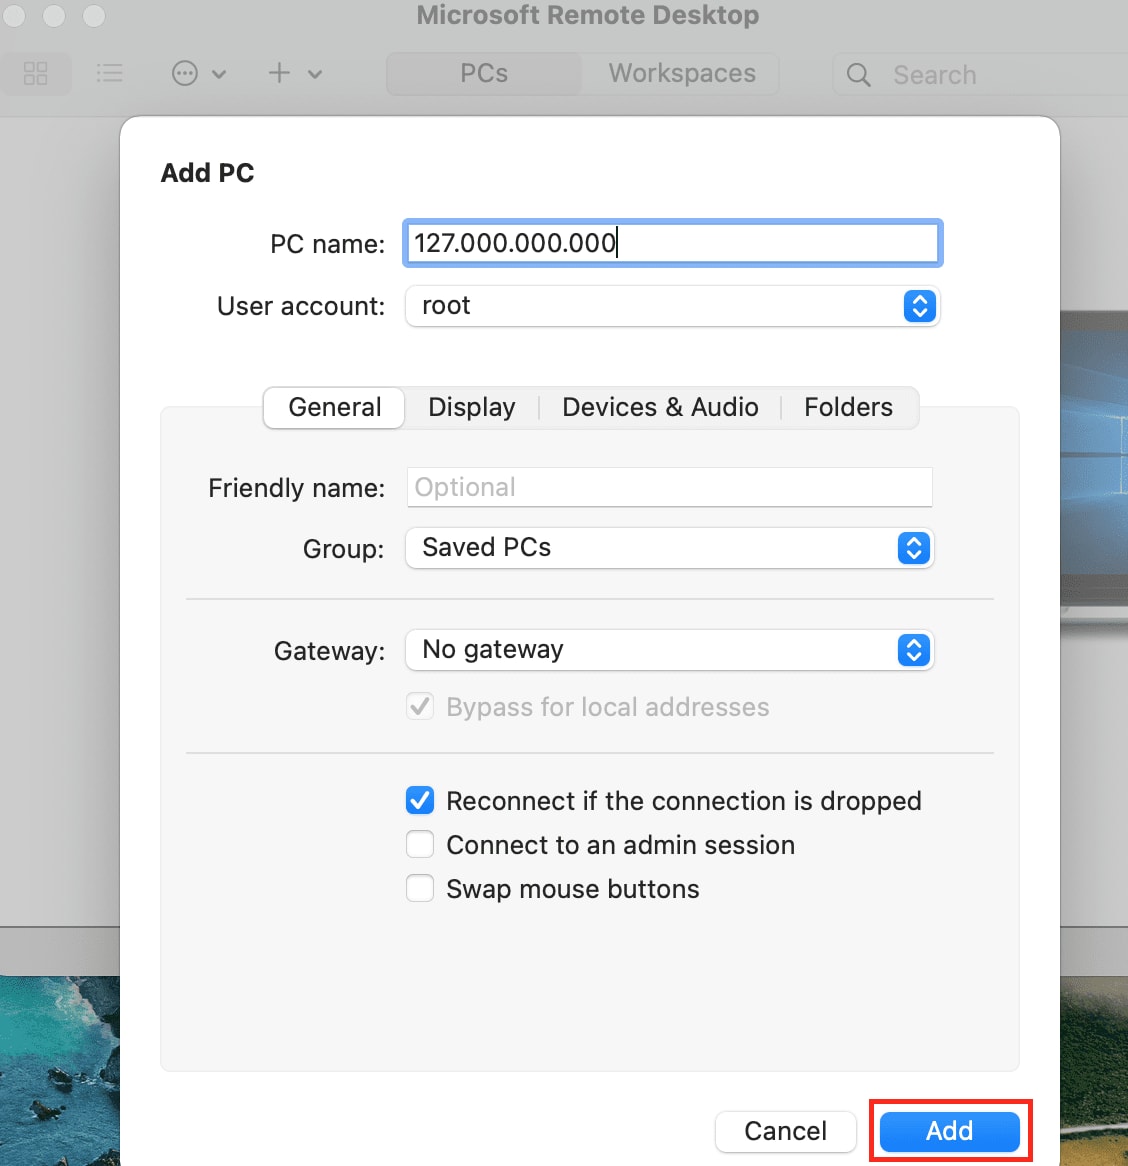
Fill out the highlighted boxes for the Windows server.
- PC Name: Enter the Windows server’s IP address.
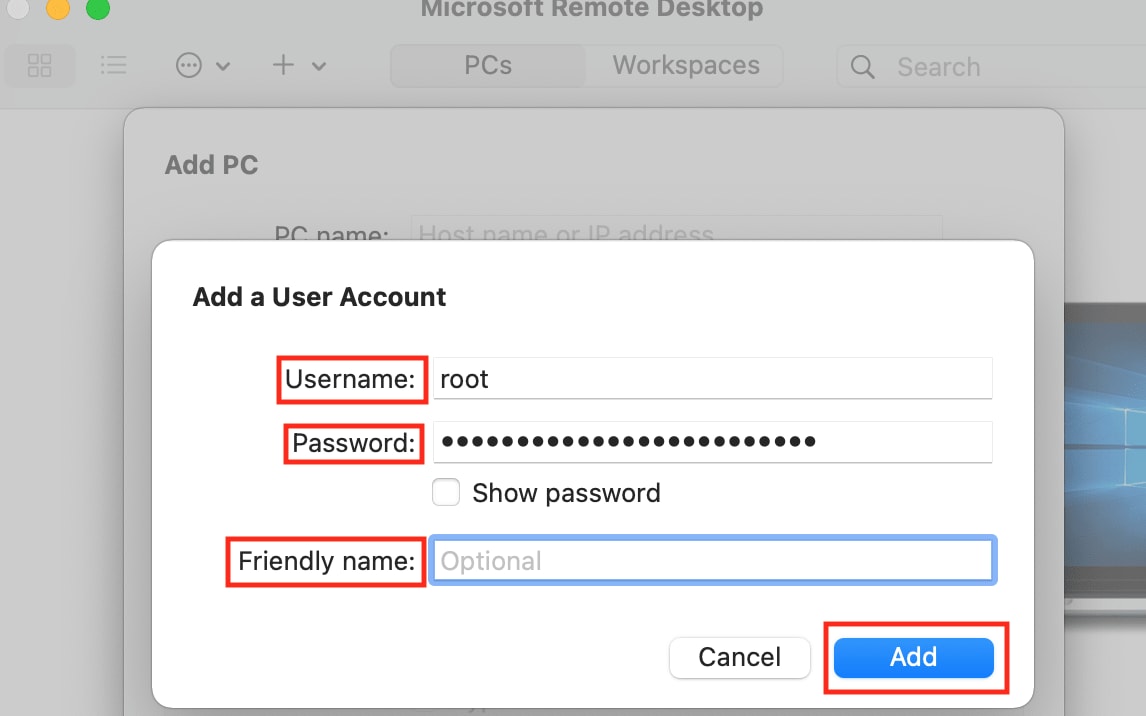
- User Account: Click the dropdown menu and select Add User Account.
- User Name: Input your username for the target PC. For this example, we used root.
- Password: Input your password for the target PC.
- Friendly name (Optional): Here, you can choose to enter a name for your User Account. For this example, we have left this field blank. Click Add once completed.
- Group: The default will be Saved PCs. You can click the dropdown menu and add a custom Group Name if you would like.
- Gateway: If a VPN or other connection is necessary for accessing the server, you can click the dropdown menu and add it here. Otherwise, leave the default of No gateway, as in this example.

Once completed, click Add.
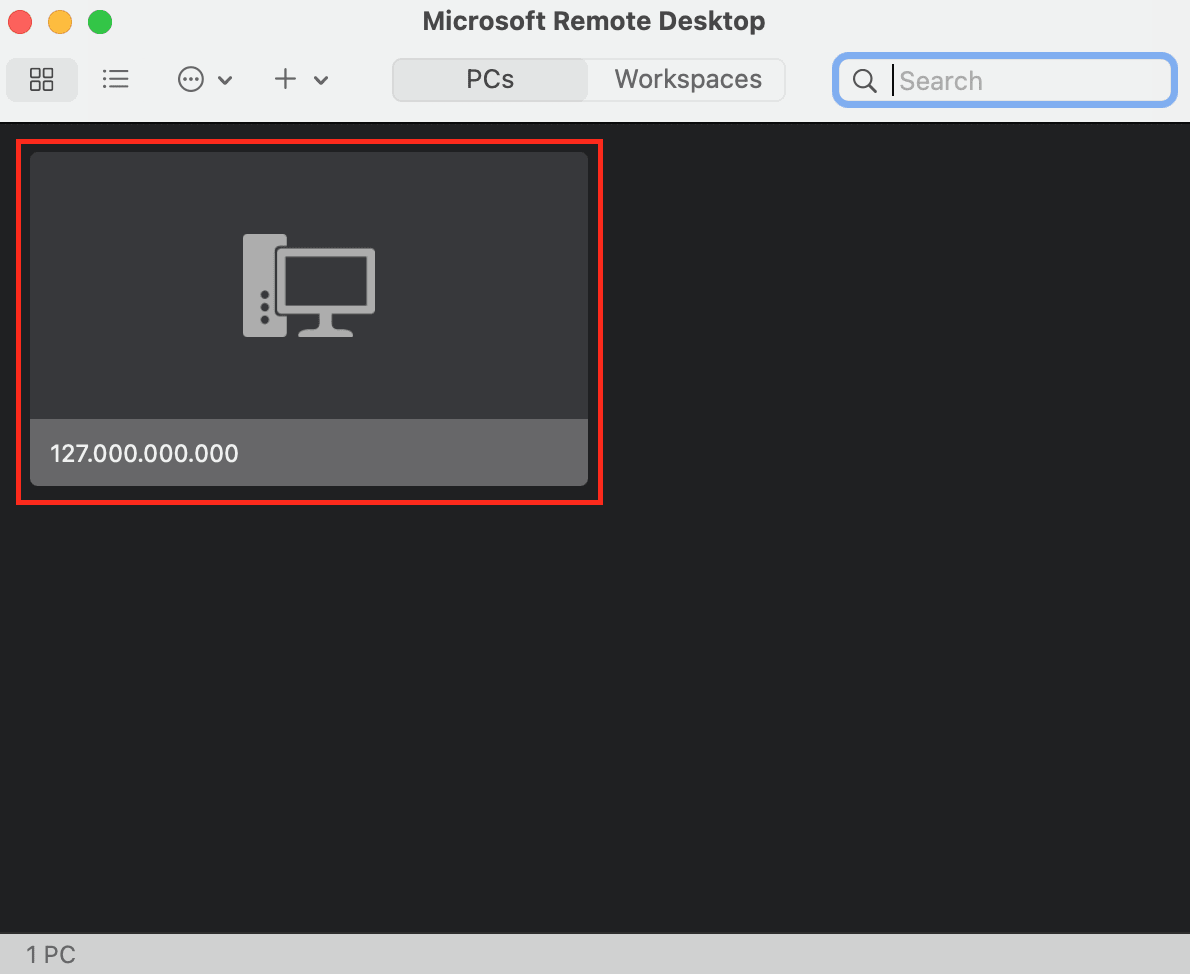
Your new server will show up as an icon in your PCs list.
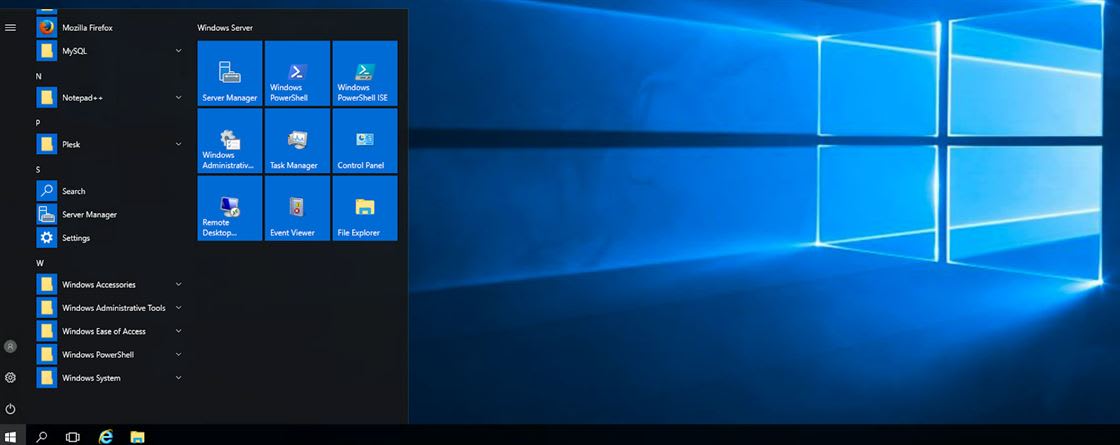
Step 5: Open Your Windows Environment
Double click on the icon for your server to connect to your Windows environment. If you entered the information correctly, the Windows environment would appear.
Conclusion
Using a remote desktop connection on Mac offers flexibility for system administrators who need to maintain a Windows server remotely. By installing the Microsoft Remote Desktop Mac application and following the steps in this tutorial, you can get logged in and working on your server in no time.
Are you hosting a fully managed or core-managed Windows server with Liquid Web? We offer VPS, Cloud Dedicated, and Dedicated servers for your hosting needs. Speak with a salesperson today so that you can set up a remote desktop connection on Mac to your Windows server.
Related Articles:


About the Author: Ronald Caldwell
Ron is a Technical Writer at Liquid Web working with the Marketing team. He has 9+ years of experience in Technology. He obtained an Associate of Science in Computer Science from Prairie State College in 2015. He is happily married to his high school sweetheart and lives in Michigan with her and their children.


Our Sales and Support teams are available 24 hours by phone or e-mail to assist.
Latest Articles
How to Clone a Drupal Site to Another Domain
Read ArticleTop Eight Virtualization Security Issues and Risks
Read ArticleAccessing Man Pages on Ubuntu 16.04 LTS
Read ArticlePremium Business Email Pricing FAQ
Read ArticleMicrosoft Exchange Server Security Update
Read Article