


Creating Client Accounts in Cloud Sites
With Cloud Sites, you can create client accounts for easy client management. These client accounts group your clients’ sites together, so you can quickly see which websites belong to which clients. You can even allow your clients access to a Cloud Sites control panel containing only their sites.
Creating a Client Account in Cloud Sites
-
- Log into your Cloud Sites account.
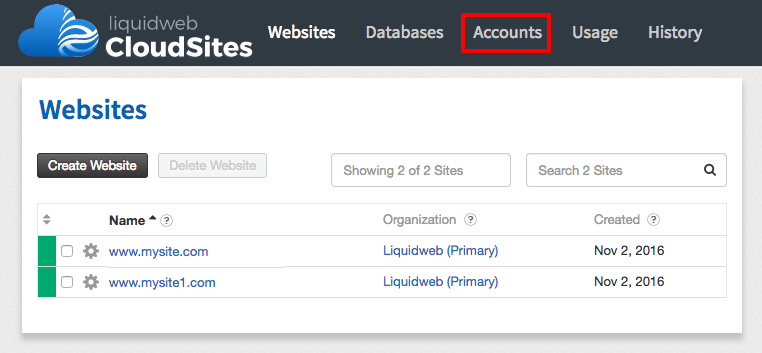
- In the top navigation menu, click on Accounts.
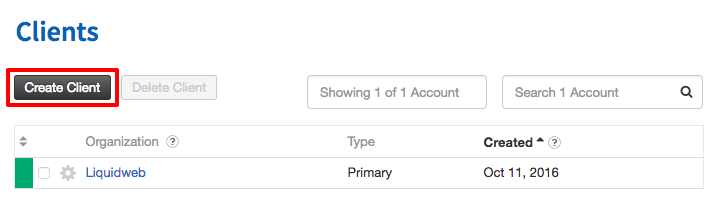
- If you already have client accounts, you’ll see them listed here. Click Create Client.
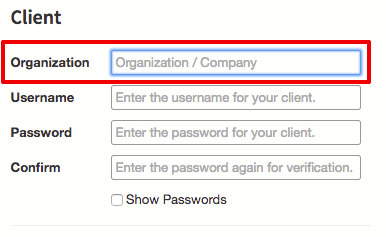
- Fill in your client’s organization or company. This will be how their account will show in the client account listing.
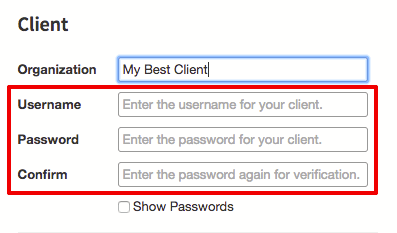
- Choose a username and choose and confirm a strong password for your client account. If you want your client to have access to their websites (for FTP purposes, etc), you can give this username and password to your client.
- Then, add contact information for your client.
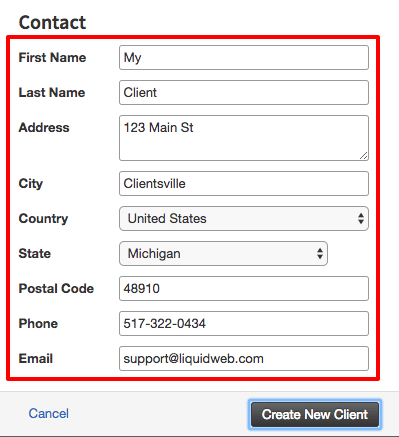
- Once you’ve added your client’s information, click Create New Client. Your new client will show up in the client list.
Once you’ve added your clients, you can begin adding websites to Cloud Sites and assigning them to a client.
Related Articles:


About the Author: David Singer
I am a g33k, Linux blogger, developer, student, and former Tech Writer for Liquidweb.com. My passion for all things tech drives my hunt for all the coolz. I often need a vacation after I get back from vacation....


Our Sales and Support teams are available 24 hours by phone or e-mail to assist.
Latest Articles
How to Clone a Drupal Site to Another Domain
Read ArticleTop Eight Virtualization Security Issues and Risks
Read ArticleAccessing Man Pages on Ubuntu 16.04 LTS
Read ArticlePremium Business Email Pricing FAQ
Read ArticleMicrosoft Exchange Server Security Update
Read Article