


How to Configure Your Liquid Web VPN
Liquid Web offers a free Virtual Private Network (VPN) user with every account. A VPN uses encryption to secure your computer’s connection to the Internet and guarantees that all of the data you’re sending and receiving to the Liquid Web network is secured from any potential prying third parties.
Be security-minded.
A VPN will secure and encrypt inherently insecure communications (such as HTTP, FTP, SMTP, etc.) to the Liquid Web network, even while using an untrusted public network.
Who uses a VPN? People just like you.
The Professional: Whether working from a permanent home office, or simply getting a few important projects done from home, a VPN will provide secure access to files stored on your dedicated server.
Remote Developers: Do you have a remote fleet of WordPress, Joomla, PHP, Drupal, or other CMS’s that need secure access to a dedicated server on your hosting infrastructure? If so, a VPN is not only perfect, but should be required.
The World Traveler: Working on your top secret startup from abroad? Or perhaps uploading photos from your most recent adventure? Prevent snooping by using a VPN.
Once you’re logged into your Liquid Web Manage account, follow the steps below to create a VPN user and get connected!
Step #1: Create a VPN User
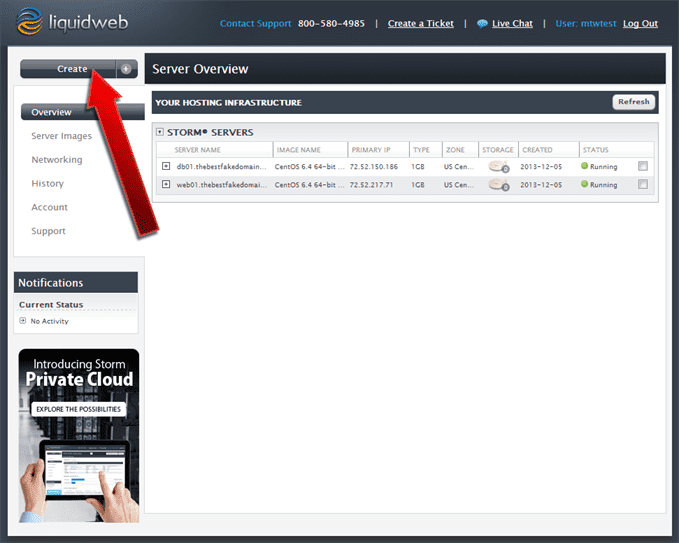
Click on the Create button in the top left corner.
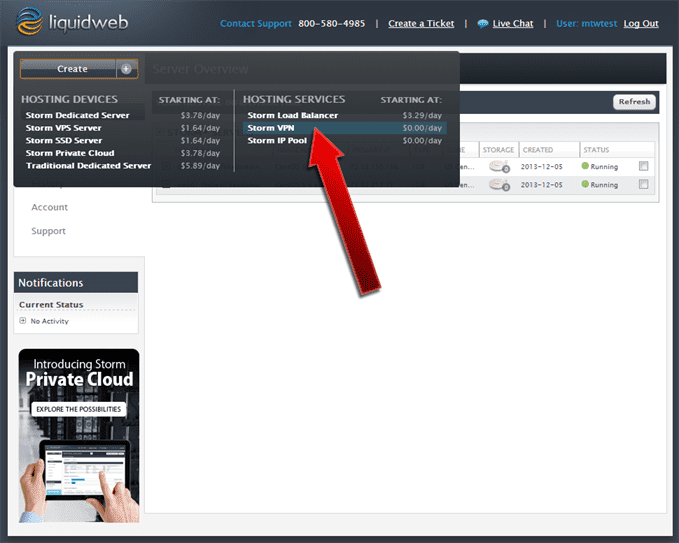
Select Storm VPN from the menu that appears.
Complete the Domain Name for VPN field with a hostname for your VPN account. For example: vpn.yourdomain.com
Then, click on Create VPN.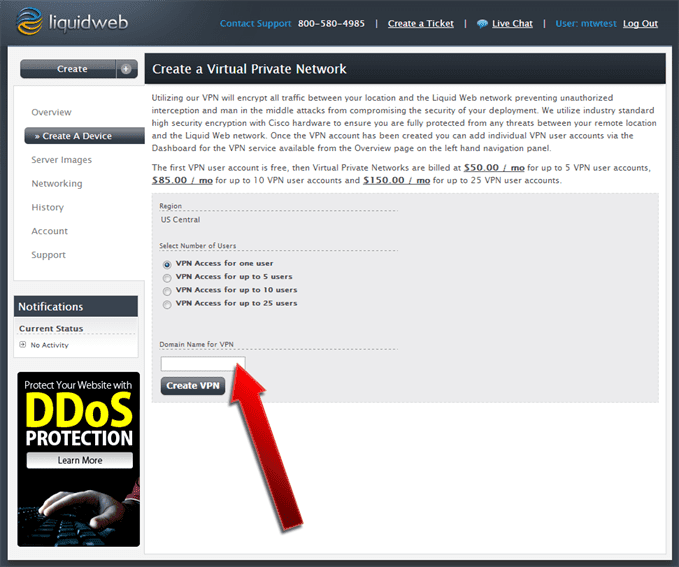
A dialogue box confirming the creation of the VPN will appear. Verify the information and then click Create VPN to continue.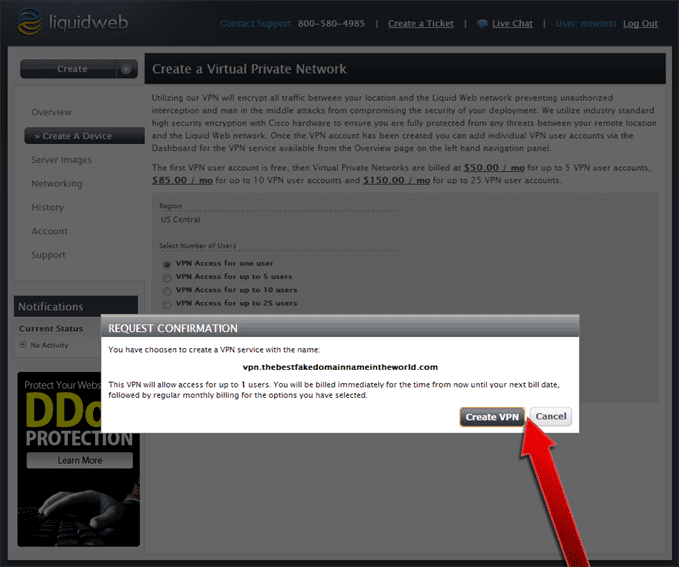
Complete the fields in the section Add a VPN User. Be sure to choose a strong (and matching) password for the Password and Confirm Password fields. To generate a strong password, you can visit strongpasswordgenerator.com.
Once you’ve completed the necessary fields click on the Add button.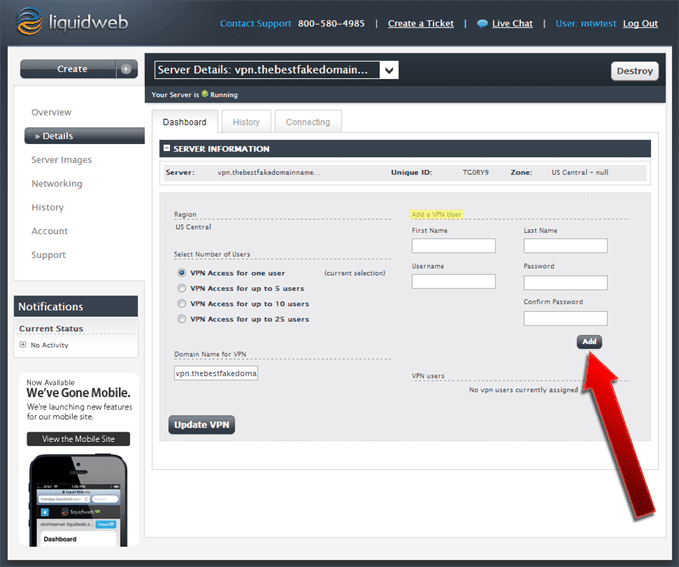
A dialogue box confirming the creation of the VPN user will appear. Verify the information and then click Authorize VPN User to continue.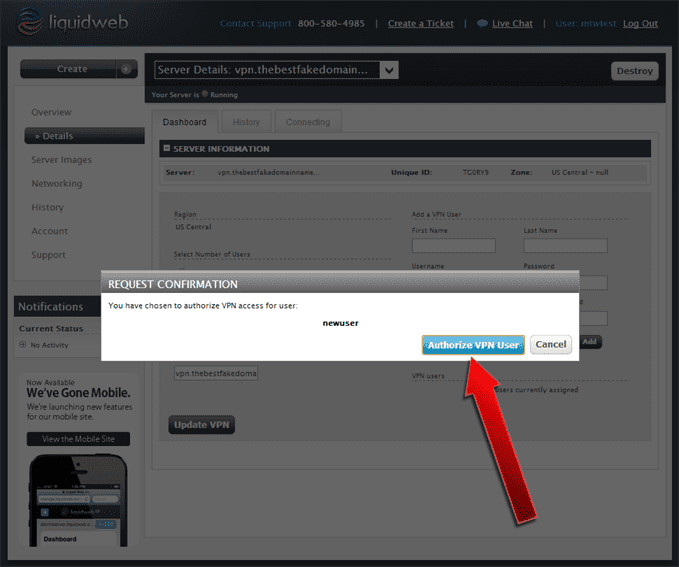
Congratulations!
Your VPN user is now set up and ready to use. Proceed to Step #2 for information on connecting to the VPN.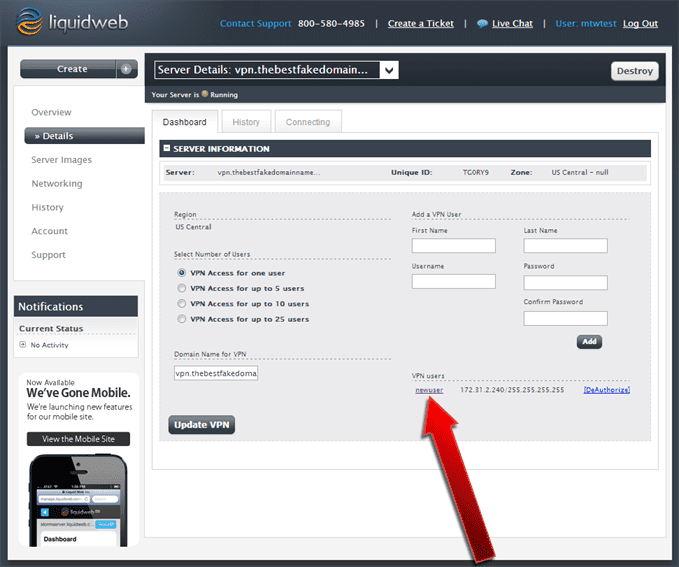
Step #2: Configure and Connect to Your VPN
Click on the Connecting tab for further instructions on downloading and configuring the VPN client.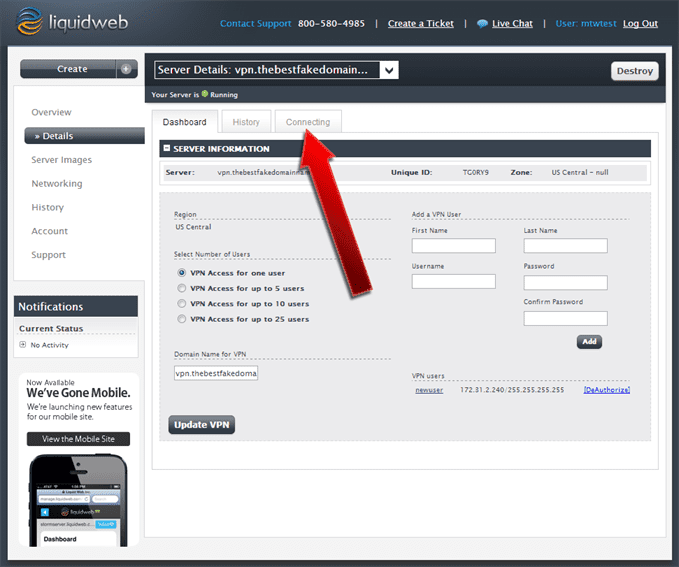
Feel safer
Once connected you’re ready to access your servers securely. If you’re having trouble connecting to the VPN, simply open a ticket with the Liquid Web Heroic Support team!
Explore securely
Via a VPN you’ll connect securely to your dedicated server via Remote Desktop, FTP, HTTP, and many other otherwise insecure protocols.
Related Articles:


About the Author: J. Mays
As a previous contributor, JMays shares his insight with our Knowledge Base center. In our Knowledge Base, you'll be able to find how-to articles on Ubuntu, CentOS, Fedora and much more!


Our Sales and Support teams are available 24 hours by phone or e-mail to assist.
Latest Articles
How to Clone a Drupal Site to Another Domain
Read ArticleTop Eight Virtualization Security Issues and Risks
Read ArticleAccessing Man Pages on Ubuntu 16.04 LTS
Read ArticlePremium Business Email Pricing FAQ
Read ArticleMicrosoft Exchange Server Security Update
Read Article