


Series: Getting Started With our Optimized WordPress Templates
In this article, we will be reviewing how to connect to your WordPress Optimized Template using SFTP as the connection medium.
How To Restore WordPress Optimized Template Backups
WordPress Optimized Template sites installed via the Sites tab in Manage automatically are backed up each day, with the server retaining the 10 most recent backups. You can easily restore any site from an available backup in the Sites dashboard in Manage.
Using WP-CLI With Your WordPress Optimized Template Site
Using the Command Line Tools
Liquid Web’s WordPress Optimized Template servers come with a pre-installed set of command-line tools designed to simplify common site maintenance tasks. WP-CLI (WordPress Command Line Interface) can be accessed via SSH, and allows you to do nearly anything that can be done from within the WordPress admin interface.
Pre-Flight Check
- This article applies specifically to Liquid Web’s Managed WordPress servers.
We will be adding a WordPress site directly through the Manage interface, the preferred method for WordPress Optimized Template servers.
Step #1: Open the Server Dashboard
- Log into your Manage dashboard and click the [+] button to the left of your WordPress Optimized Template server’s name to expand the dashboard.
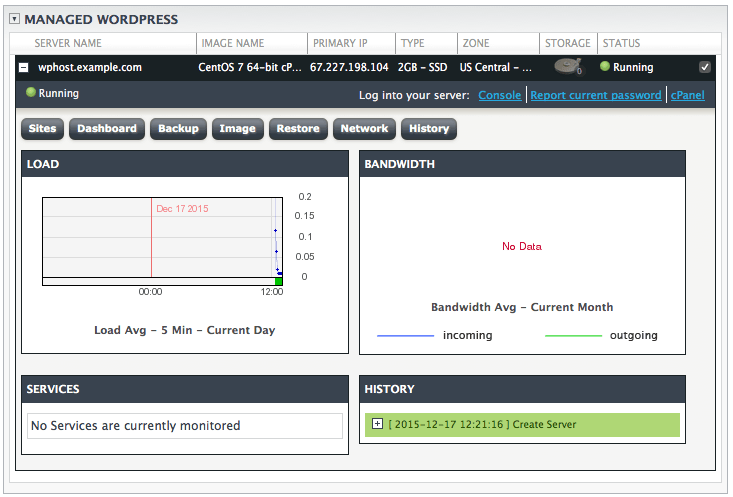
- Click on the Sites button in your dashboard to launch the WordPress Sites view.
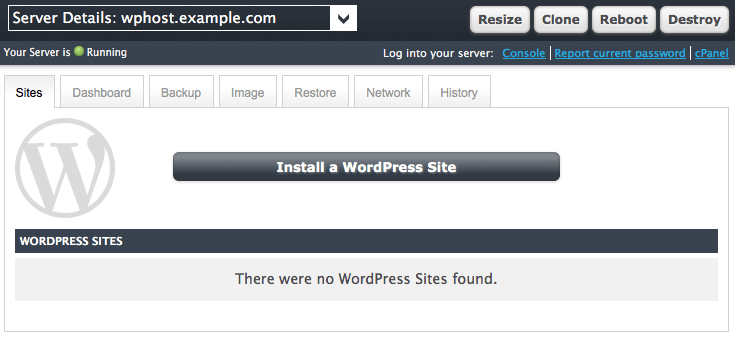
Step #2: Add A Site
- To add a site, click the Install a WordPress Site button, fill out the requested information, and then click Add Site to add the new site.
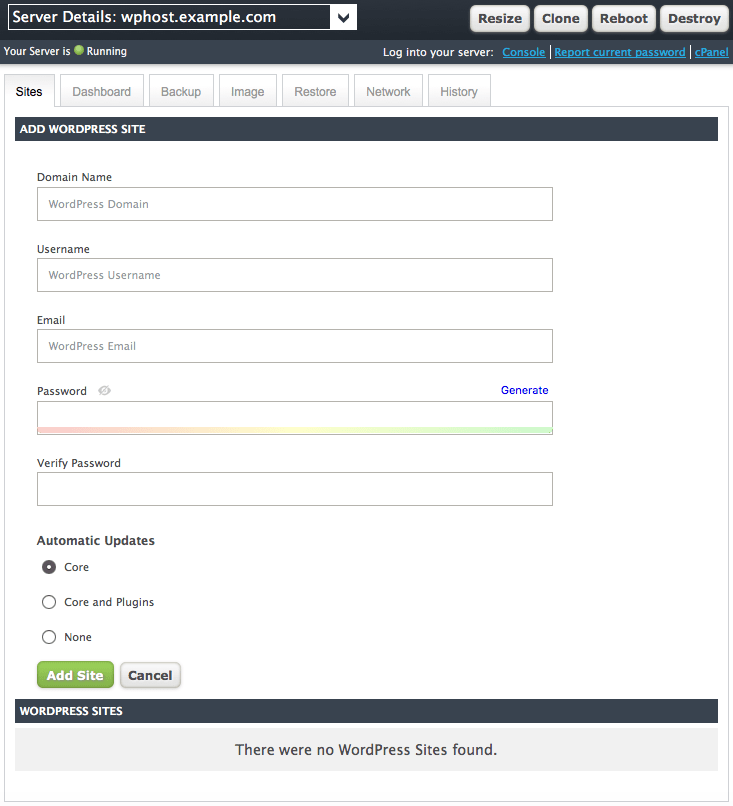
- Domain Name is the domain name you want to add to the server. If the domain name is using Liquid Web nameservers, a free SSL certificate will be ordered and installed on the domain, and WordPress will be configured to use the https protocol on the site. If the domain name is pointed elsewhere, an SSL can be added later.
- Username is the WordPress admin user. The username specified here will be used to log into both WordPress and the site’s cPanel account. It must be 16 characters or fewer.
- Email is the contact information for the site.
- Password is the credential which will be used to log into both WordPress and cPanel. It should be a strong password, and can contain upper- and lower-case letters, numbers, and basic special characters such as underscores.
- Verify Password requires you to enter the password again, and will alert you if it does not match what was entered on the Password field.
- Automatic Updates allows you to choose between automatically updating WordPress itself (Core), WordPress and its plugins (Core and Plugins), or disabling automatic updates altogether (None). It is recommended to at least enable automatic updates for WordPress itself.
- The site now will be listed in your Sites dashboard, where you can change update preferences or install a free standard SSL on the domain.
Step #3: Review Settings
Once you return to the Sites dashboard in Manage, you’ll now see your new WordPress site listed in the WordPress Sites section. Click on the [+] next to the domain name to expand the view and configure options for the site.
Liquid Web’s Managed WordPress product is a complete WordPress hosting solution, optimized for maximum performance and blazing speed, backed by our Heroic Support®. Liquid Web WordPress Optimized Template servers are designed from the ground up to provide:
cPanel How To: Change a Domain’s MX Record
In this guide, we will walk you through the process of changing a domain's Mail Exchange (MX) record(s) to point email at a different VPS server. MX records are a critically important part of a website's DNS because they tell the rest of the internet where to send email for a domain.
Our Sales and Support teams are available 24 hours by phone or e-mail to assist.